How to make a Rainbow Layer Cake using white chocolate mud recipe

Rainbow Cake
Rainbow Layer Cake

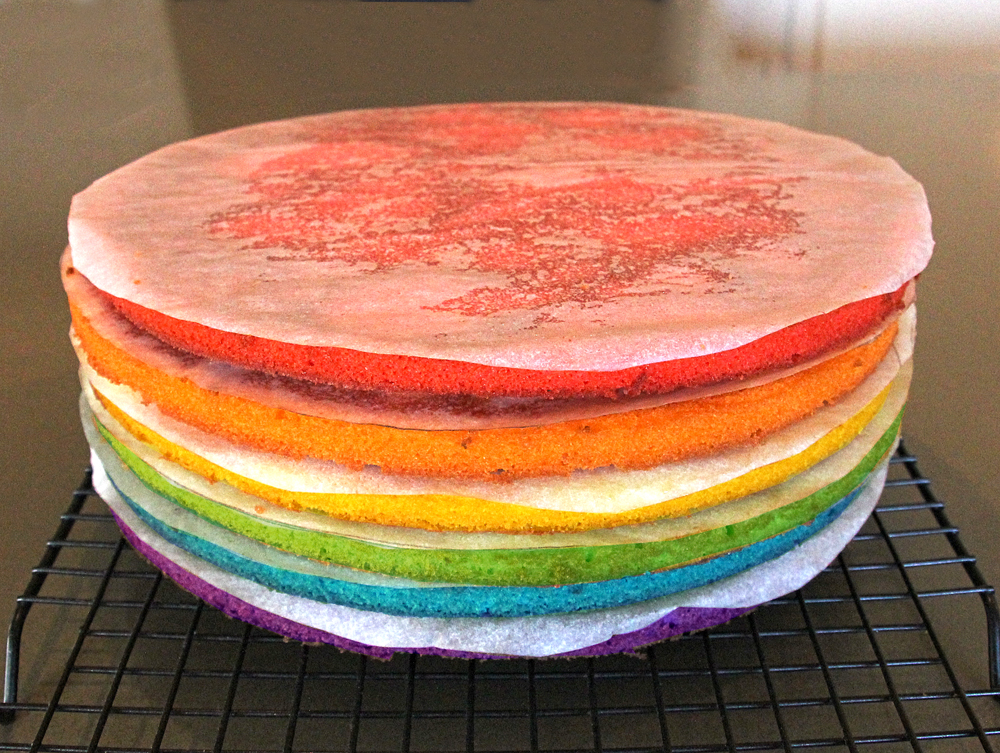
This cake is similar to my Rainbow Cake below and you can find full instructions for it here.

Rainbow Cake
Rainbow Cake

Three things make this cake special

1. The Rainbow Layers. They can be a big surprise if the recipient and/or guests have no idea what is inside.

2. The cake is based on a White Chocolate Mud Cake. Lots of people are scarred to use colours with Chocolate mud cakes if they do not have the special chocolate colours. I did a lot of research before I used my ordinary food colours and the reason they work is because we are not colouring 100% pure chocolate. The other ingredients magically make it alright to use Wilton or AmeriColor (these are the only two makes that I have tried so far).

3. You can make this cake even if you do not have 6 x 10″ round cake pans. I have 2 x 10 inch pans and I bake the layers in 3 batches. You could make do with just one pan, it will just take a little longer.

Colours of the rainbow
Colours of the rainbow Red, Orange, yellow, green, blue and purple.
Coloured cake batter
Use 2 x 10 inch pans

White Chocolate Mud Cake 

(Planet Cake recipe)

Need a minimum of one 10″ pan ( 6 x 10″ pans would make the job really easy though!)

I used 2 x 10″ pans as that is all I have.

390g butter
390g white chocolate
350ml water
195g SR flour
390g plain flour
520g caster sugar
4 eggs, lightly beaten
2 tsp vanilla essence

White Chocolate Mud Cake Method

  1. Preheat the oven to 150C.
  2. Grease and line bases of both cake pans with one thickness of baking paper.
  3. Combine chopped butter and water in a saucepan.
  4. Stir over low heat until butter is melted. Turn off heat, then add the chocolate and stir until it has melted and is well combined.
  5. Sift flours into a bowl. Add sugar, a pinch of salt and make a well in the centre.
  6. Pour chocolate mixture, egg and vanilla into the well then stir with a wooden spoon until well combined.
  7. Divide the batter equally amongst the 6 bowls.  Weigh your mixing bowl before you begin adding ingredients and then subtract the weight of the bowl from the final measurement after the batter is completed. Divide that number by six and add that weight of batter to each bowl, and then whisk a fair amount of the appropriate food color into each bowl. Keep in mind that the color of the unbaked batter will be the color of the baked batter. Pour into the pans and bake for 15 minutes each or until a skewer comes out clean when poked into the middle of the cake.
  8. Once cake pans have been washed, repeat the process twice more till all 6 layers have been baked.


Rainbow layers ready for buttercream

Lemony Swiss Meringue Buttercream

As you can see from the recipe, this cake requires a huge amount of buttercream to fill the layers and cover the outside. I would recommend that you make the buttercream in two separate batches ( 1. To fill and crumb coat. 2. To frost) because you would need a HUGE bowl to make this much buttercream at one time!

Please click here for a step-by-step guide to making Swiss Meringue Buttercream and troubleshooting tips!

To fill and crumb coat:

9 egg whites
1 ¾ cup (350 g) sugar
4 sticks (452 g) butter, room temp
2 tsp lemon extract

To frost:

5 egg whites
1 cup (200 g) sugar
2 sticks (226 g) butter, room temp
1 tsp lemon extract

Cook the egg whites and sugar in a small saucepan over medium heat, whisking constantly, until the sugar is completely dissolved (test by rubbing some between your fingers. If it’s completely smooth, it’s done). Pour into another bowl (a stand mixer is preferable) and whip on high speed until room temp. Then, on a medium-slow speed, add the butter, waiting until each piece is completely incorporated before adding the next. After all the butter has been added, turn the mixer back to high speed and whip until it has come together, about five minutes. Add the extract, beat briefly and then use.

If the buttercream seems soupy after all of the butter is added and does not come together after whipping, refrigerate for 5 to 7 minutes and continue whipping until it becomes fluffy and workable.
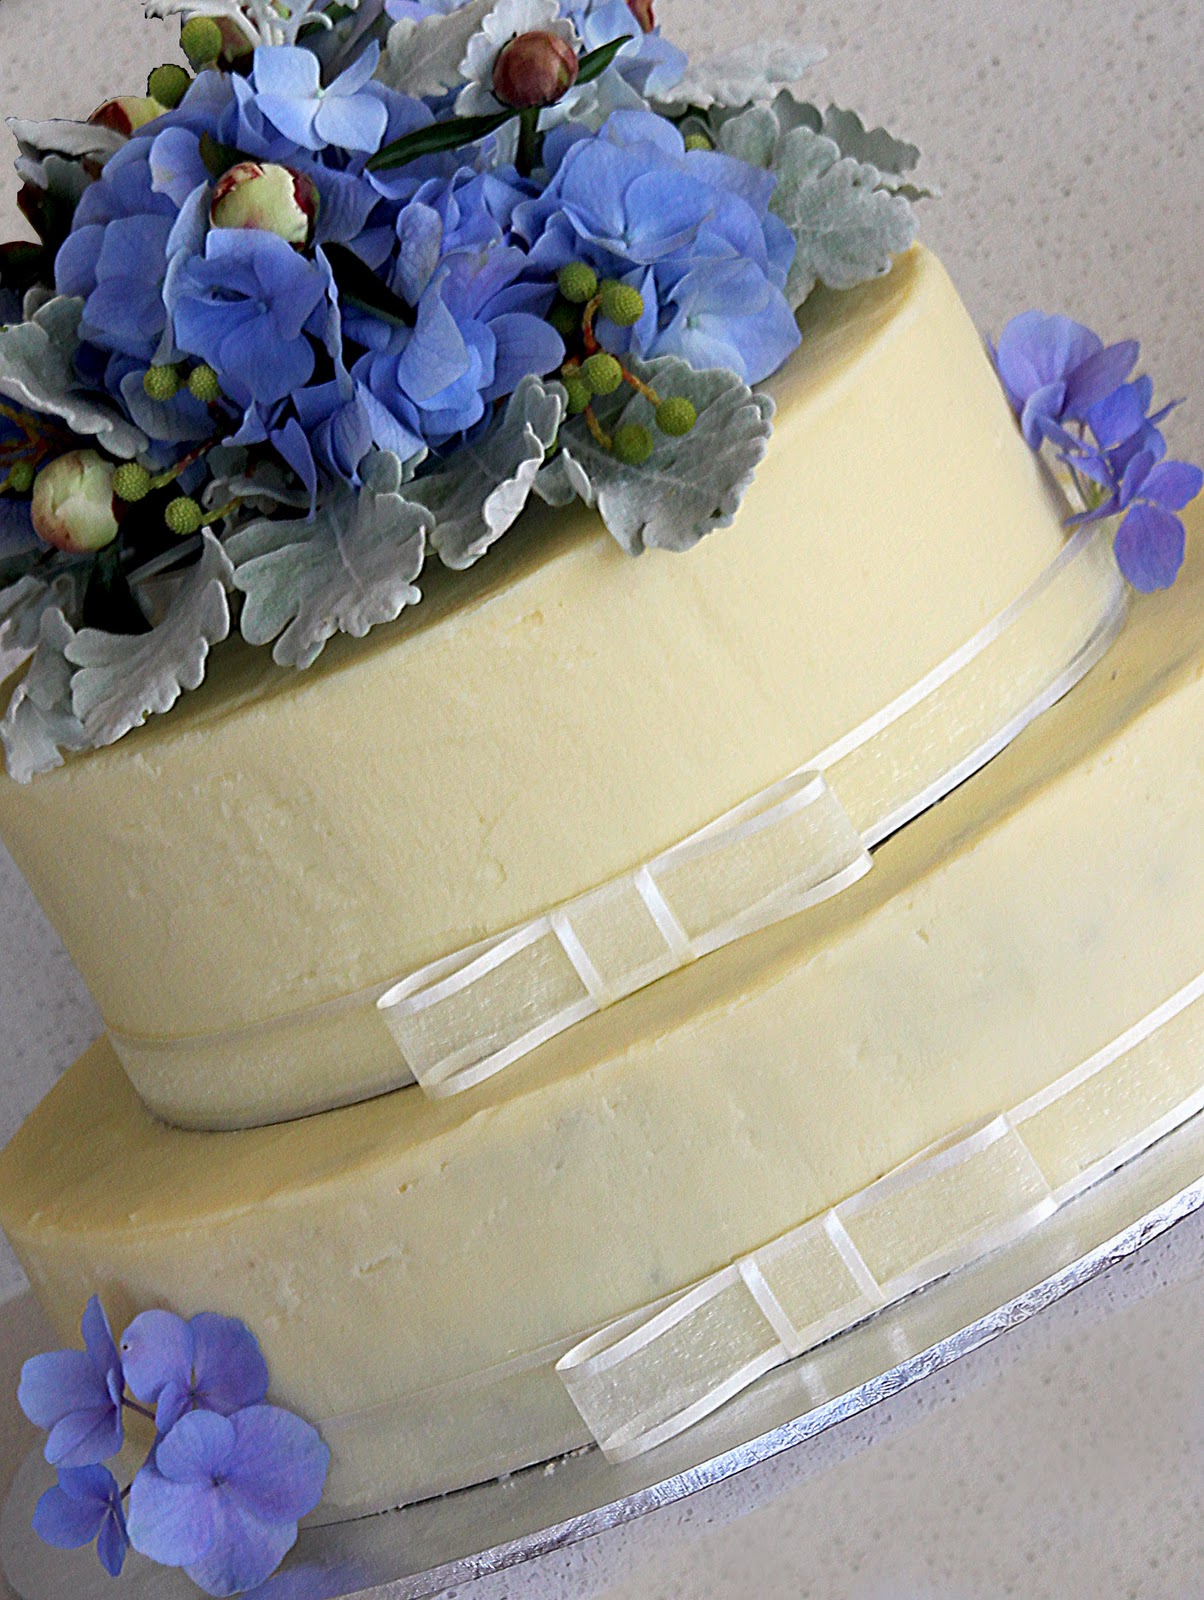
Filled with buttercrem

Assembly

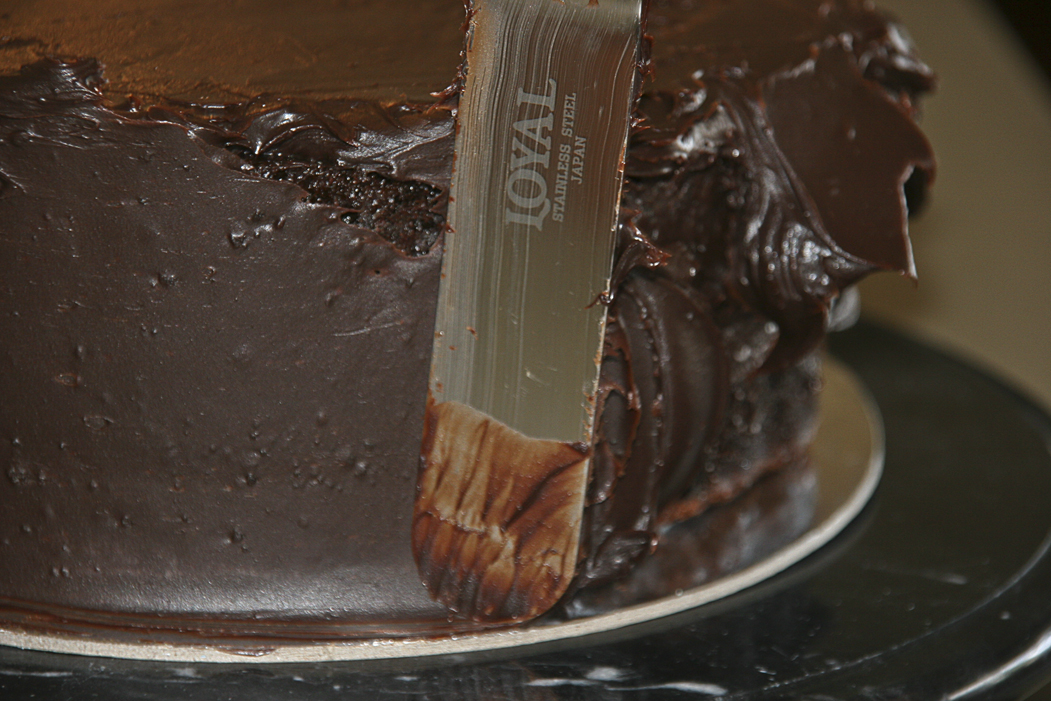
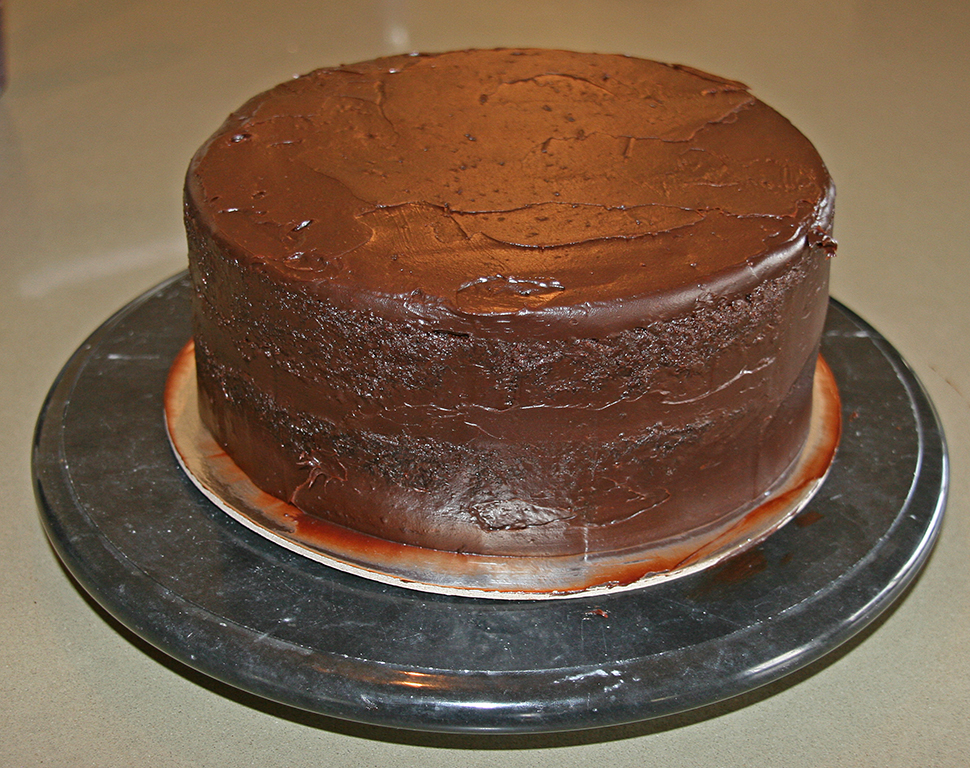
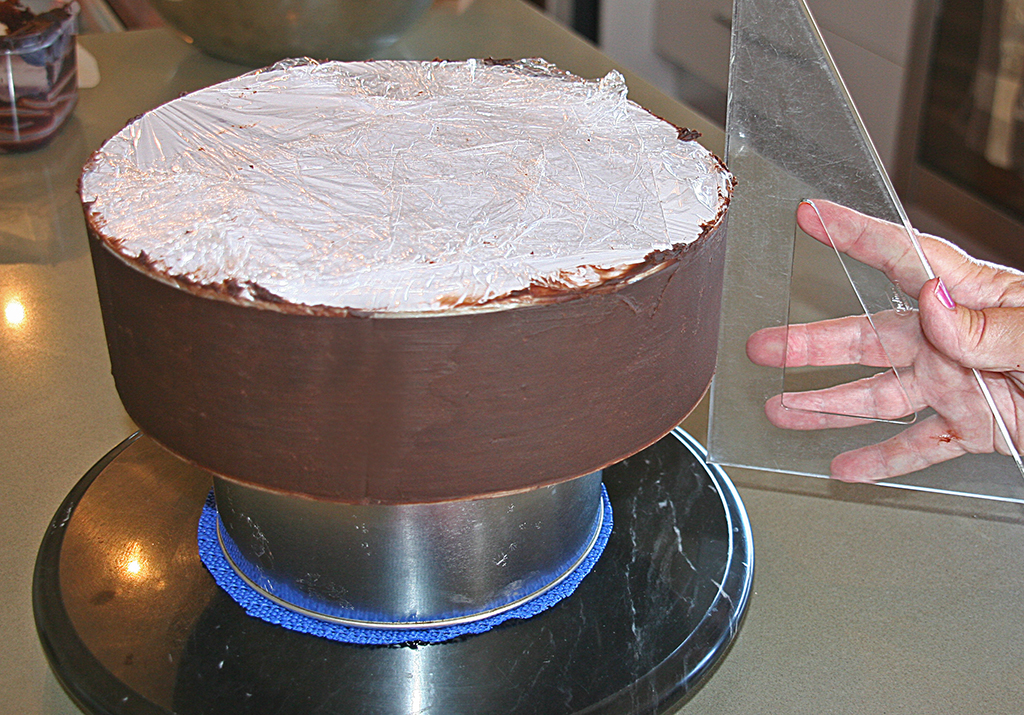
Stack the layers in your preferred order and fill and frost as you would any other cake.

Once frosted, the cake can be left on the counter without any problems, but feel free to refrigerate it. Just be sure that the cake is at room temperature when serving or the frosting will be hard.

A slice of Rainbow Cake

80s Theme Cake

This 80s Theme Cake was made for Jessica’s 30th Birthday Bash in Brisbane. It is made from white chocolate and dark chocolate marbled mudcake, filled with dark chocolate ganache and covered with sugarpaste. The Rubik’s Cube is a really delicious truffle.
The birthday girl wanted hot pink, turquoise and yellow as her colours but you could use whatever colours you wish. To celebrate her 1980s themed birthday the cake incorporates the MTV logo, Pacman arcade game, Rubik Cube, Boogie box, fluorescent colours and animal print fondant, not to mention the giant number ’30’.

 
Baking Diary
DAY 1
Colour sugar-paste. Hint – You can buy ready coloured black sugarpaste which saves a big mess. Also I used Wilton’s Rose edible gel colour for the hot pink.
Make ganache click here for detailed ganaching info

Bake cakes
Wrap cakes in foil and place in fridge overnight.
Cut finger nails. There is nothing worse than making a mark with your long nails on your completed cake.
DAY 2
Take cake out of fridge first thing in the morning and allow to come to room temp.
Torte and ganache cake then leave it to set. click here for detailed ganaching info
Once set cover with sugar-paste.
DAY 3 
Decorate and complete the job.
DAY 4 
‘Stuff up’ day. You never know what might happen when making a cake so always pencil in a ‘stuff up’ day (I had a day with my feet up when making this cake as I had a toenail removed, ouch!)
DAY 5  The day of the party
 
Marbled Mudcake
The three tiers are made up of a 7″ round, a 5″ round and a 4.5″ square. The rubik cube (1.25″ / 3 cm) is made from the cut offs from the Boogie box mixed with left over ganache formed into a large truffle cube and covered on all sides with a thin layer of ganache.Make the light and dark mudcake batter in separate bowls then pour the dark in first filling your pans to half the usual height then fill each with the white choc mud batter and gently stir round a little to mix and bake for 1.5 hrs at 150C
 
Dark Chocolate Mud Cake (Pam’s recipe)
187g butter
150g dk choc
1 tbsp coffee, powder or granules
1 cup water
1 cup SR flour
3/4 cup caster sugar
1/4 cup cocoa
2 eggs
1 tsp vanilla essence
 
Dark Chocolate Mud Cake Method
    1. Preheat the oven to 150C.
    2. Grease and line base and sides of cake pans with one thickness of baking paper, bringing paper 5cm above side of pan.
    3. Combine chopped butter, chopped chocolate, coffee, and water in a saucepan.
    4. Stir over low heat until chocolate is melted. Cool 15 minutes. Transfer mixture to bowl of mixer.
    5. Add caster sugar to mixture and beat well until dissolved. Add sifted flour and cocoa, lightly beaten eggs and vanilla.
    6. Pour mixture into prepared pans stopping at half the height you normally fill to.
No need to be delicate with this one – just make sure that the chocolate mixture has cooled sufficiently so as to not create a thickening reaction when the flour is added.
 
White Chocolate Mud Cake (Planet Cake recipe)
185g butter
185g white chocolate
170ml water
95g SR flour
185g plain flour
250g caster sugar
2 eggs, lightly beaten
1 tsp vanilla essence

White Chocolate Mud Cake Method
  1. Preheat the oven to 150C.
  2. Grease and line base and sides of cake pans with one thickness of baking paper, bringing paper 5cm above side of pan.
  3. Combine chopped butter and water in a saucepan.
  4. Stir over low heat until butter is melted. Turn off heat, then add the chocolate and stir until it has melted and is well combined.
  5. Sift flours into a bowl. Add sugar, a pinch of salt and make a well in the centre.
  6. Pour chocolate mixture, egg and vanilla into the well then stir with a wooden spoon until well combined.
  7. Add the white batter to the already half full pans and fill to their normal height.

Marbling
To create the marbling effect simply gently stir round a little to mix (Do not overdo) and bake for 1.5 hrs at 150C. Check the small cakes before their time is up.

 
 Dark Chocolate Ganache click here for detailed ganaching info
1600g dark chocolate, finely chopped
800ml pure cream
  1. Grind the chocolate to fine granules in a processor.
  2. Put the chocolate in a large bowl
  3. Put the cream in a saucepan and bring to boiling point. Pour the cream over the chopped chocolate and mix with a hand whisk until the ganache is smooth. (Do not use an electric whisk, as you will create too many air bubbles in the ganache.)
  4. Allow to cool completely and then leave to set overnight.

Decoration
Templates can be found on my Free Stuff page click here
I used a whole lot of edible glue on this cake. I even stuck the tiers together with glue as it wasn’t a big heavy cake and the glue would survive the 200km round trip delivery.

Edible Glue
Also called Gum Glue
Add 2 tablespoons of warm water to a quarter teaspoon of Tylose Powder and allow the Tylose powder to melt. Don’t worry if at this stage the glue appears not to be blending. Put a lid on the container and leave it in the refrigerator overnight and in the morning you will have a perfectly clear and ready to use glue.
 
The glue should be a dripping consistency. If it is too thick, just add a little more water and stir with a toothpick .
 
The edible glue should be stored in the refrigerator when not in use.
 
To apply the glue, use a good quality paintbrush and brush on to the area where you are going to be working. Leave until it begins to dry a little so that the area is just tacky to touch.
The animal print is made up of thin strips of black sugarpaste.
Some sugarpaste shapes for the Boogie box, Rubik’s Cube and Pacman
Pattern pieces for the more complicated shapes can be found on my Free Stuff page. Flat pieces such as the ’30’ and the ‘MTV’ logo should be made early and left flat. Curved pieces such as Pacman should be stuck to the cake soonish so that they can mould themselves to the shape of the cake. Add Tylose powder to any parts that need to be very stiff such as the MTV logo. I added just a quarter of a tsp of Tylose to a lump of pink which I used for the ’30’ and the ‘MTV’. Knead the powder into the sugarpste till well combined.
To make the handle for the Boogie box use some plastic tubing with cocktail sticks pushed in at the ends. Stick the sugarpaste on with edible glue.
You will need 45 coloured squares in total (none on the bottom) and stick them on with edible glue. Each square is 1cm x 1cm. Secure to the cake using two short wooden skewers and edible glue.
I used this image in the background of my cake picture. I made the image a couple of years ago with camper vans and surf board, typical of the Gold Coast and reminiscent of the ’80s. I changed the colours to suit the colour scheme of the cake.

Frangipani Chocolate Box Cake

This is a wonderful cake suitable for all sorts of occasions – birthdays, Valentine’s, Mother’s Day, anniversary’s etc. I made this cake for the first time for my friend Lesley’s birthday and it was such a success that I have made it many times since and each time I give it a different look. This cake was for an 65th Birthday surprise. 


Below are the instructions you need to make this cake including my 10 minute video clip ‘How to make fondant  frangipanis’ using an individual frangipani petal cutter and a step by step guide to making frangipanis using a one piece rose cutter. Decide which method you prefer and have a go.


Instructions are for a 6″ dark chocolate mud cake filled with dark chocolate ganache and covered in sugar-paste


Ingredients

Dark Chocolate Mud Cake 
100g butter
 
100g dark choc
 
10g coffee
 
70ml water
 
55g SR flour
 
55g plain flour
 
20g cocoa powder
 
0.25 tsp bicarb
 
210g caster sugar
 
2 eggs
 
3 tsp oil
 
45ml buttermilk
Ganache
520g dark chocolate
 
260ml pure cream
 

Flower-paste

700 grams of rolled fondant (I used Bakels Pettinice, but any will do)
2 teaspoons of Cellogen (if you use CMC, Tylose Powder or Gum Trag then only use 1 to 1.5 teaspoons)
1/3 teaspoon raw egg white
2 teaspoons Cream of Tartar
 
a small amount of Crisco or shortening


Edible Glue
1 teasp Tylose Powder
 
Other
500g (17oz) pink sugar paste (rolled fondant)
 
30g (1oz) bag of chocolate buttons or Freckles
 
227g (1/2lb) box milk chocolate15cm (6″) thin card board for the lid.


Individual frangipani petal cutter or a one piece 5 petal rose cutter


Petal Dust in yellow


1. To make the Dark Chocolate Mud Cake

  1. Preheat the oven to 160C. Grease the tin and line the base and sides with a collar that extends 2 cm above the top of the tin.
  2. Put the butter, chocolate, coffee and water in a saucepan and stir over low heat until melted, then remove from the heat.
  3. Sift the flours, cocoa and bicarbonate of soda into a large bowl. Stir in the sugar and make a well in the centre. Add the combined egg, oil and buttermilk and the chocolate mixture, stirring with a large spoon until completely combined.
  4. Pour the mixture into the tin and bake for 2 hours (for 11’5″cake) or until a skewer poked into the centre of the cake comes out clean, though it may be a little sticky. Leave the cake in the tin until cold.
2. To make and apply the ganache click here.
Frangipani Chocolate Box Cake

3. To decorate the cake
Measure the height of the cake.Roll out 200g of the pink sugar-paste so that you can cut a strip about 46cm (18in) long and 1cm (0.5in) wider than the depth of your cake.Brush the sides of the cake with a little water.Roll the sugar-paste up like a bandage, making sure it is not too tight and then unwind it around the side of the cake.Paint a light line of water around the inside edge of the chocolate box and neatly press the chocolate buttons into the ganache. My buttons were big so I cut each one in half first.Arrange chocolates on top of the box. Stick one of the chocolates on top of the others as this will help secure the lid at an angle later on.Moisten the top and sides of your thin cake board with a little water, roll out and cover with 100g (30z) of pink sugar-paste. Trim and neaten edges.Use 200g (7oz) pink sugar-paste to cover your base cake board (moisten with a little water first), if you are using one. Cut out a long strip of sugar-paste and roll up as if a bandage and unroll to cover around the board


4. To make the Flower-paste
Flower-paste (also called modelling paste)
Prep Time: 5 minutes
Serves: Makes around 500 grams of paste
Instructions:
Use a little Crisco on your work surface and knead up your fondant so its nice and soft.
Sprinkle the Cellogen, or alternative, over the work surface and knead it into the fondant.
This flower paste is white as it is for a different cake. Sorry!
Make a well in the mix and pour in the egg white, knead until mixed through, it may feel a little sticky, add more Crisco to the surface if you need to.
Sprinkle the Cream of Tartar on the work surface and knead into the mix until all incorporated.
Wrap the paste in cling wrap tightly, a few times and place in an air tight container, leave for at least 12 hours before use.
You don’t need to refrigerate it, and it will last for months.
I cut mine up into four pieces, and generally freeze it. It defrosts with the heat of your hands in minutes.5. To make the Frangipanis

Soften the flower paste
Roll out till thin
Press down hard with your cutter
Lift up and check
Use the balling tool or something similar to push out the flower-paste shape
Stick the petals together one at a time using edible glue
Carefully paint glue along the last petal edge
Join together and make sure all the petals are evenly spaced.
Turn upside down and check that there are no gaps
Curve the petals a little
Squeeze the stem together firming everything up nicely.
Place in an egg carton overnight to harden.
6. Finishing touches
Glue the flowers around the base of the cake using edible glue.To make the glue mix the Tylose powder with approximately 4 tblsp water. Any lumps will disappear if you put the mixture in the fridge overnight.I arranged the flowers in pairs as it made a more interesting arrangement.Arrange a few of the flowers together for the top of the lid. As the flowers were hard, I pushed them into a piece of the left over flower-paste which was still soft as I had wrapped it in cling film overnight.Stick the lid to the chocolates using a blob of ganache.
 Below is a different colour combination that you might like to try.

Bumblebee Transformer Cake

Dark Chocolate Mud Cake (from Planet Cake Cookbook)
Ingredients for 7″ cake
135 g  butter
135 g  dark choc
15 g  coffee
100 ml  water
75 g  SR
75 g  plain
30 g  cocoa
1/4 tsp  bicarb
300 g  caster
3  eggs
5  tsp oil
60 ml  buttermilk
Dark Chocolate Ganache 
735 g dark chocolate, finely chopped
365 ml pure cream
Fondant
BLACK: 800g sugar-paste to cover entire cake

YELLOW: 300g Mask and number plate
To find out how to make the mud-cake and ganache filling please visit my Ben Ten Cake blogTo Decorate your Transformer Cake

Download the shape below from here and resize to fit your cake if necessary and print it out.

Cut out all the separate pieces of the mask and use them as templates to cut out the pieces of yellow sugar-paste.

Attach each piece to the top of the cake making sure that the pieces are in the right place.

To make the plaque and the number 4, simply cut out a square of yellow and attach it with some Royal Icing, edible glue or water to the front of the cake.
Cut out a number 4 in yellow and another in black with a cutter and attach, first the yellow and then the black.

If you would like to find out how to make this 5.5″  Red Transformer Cake Click Here.

Beach Cake Tutorial


This fabulous Beach Wedding Cake is covered in ivory sugarpaste and decorated with matching handmade and painted sugar-paste shells.


The bottom tier is a 10″ dark chocolate mud cake filled with dark chocolate ganache and the top tier is an 8″ white chocolate mud cake filled with white chocolate ganache.

Ingredients for 10” Dark Chocolate Mud Cake round
270g butter
270g dk choc
31g coffee
200ml water
155g SR
155g plain
60g cocoa
.6 tsp bicarb
590g caster
5 eggs
9 tsp oil
125ml buttermilk
 
Ganache
1475g dark chocolate
740ml pure cream
 
Fondant
1.475kg sugar-paste
 
Baking time
1 hr 50 mins
 
Method for Dark Chocolate Mud Cake click here

Ingredients for 8” White Chocolate Mud Cake round
240g butter
240g white choc
215ml water
120g SR
240g plain
315g caster
2.4 eggs
1.25 tsp vanilla
 
Ganache
1025g white chocolate
350ml pure cream
 
Fondant
1150g sugar-paste
Baking time
1 hr 20 mins
 

Method for White Chocolate Mud Cake click here

 
How to make ganache and cover your cake with it click here


Sugarpaste
I coloured all my sugarpaste at once using Wilton’s gel paste in Ivory.
1.475Kg for the bottom tier plus 1.150kg for top tier plus 500g for the shells

How to colour sugarpaste and use it to cover your cake click here 


How to assemble a 2 tiered cake click here 

I used Poly-Dowels from GlobalSugarArt.com to support my cake this time and found them easy to use. They are easy to cut with scissors and more hygienic than the wooden ones, I think.

Sea Shells
Using 500g of the ivory sugarpaste, I decided to make a 50/50 mix of sugarpaste/gumpaste (read ‘Successful Molding’ below for other suggestions for mediums to use with molds). I used the recipe below for gumpaste but only used half the quantities to achieve a 50/50 mix.


I used 3 First Impressions Molds which I ordered from America from GlobalSugarArt.com


S102 4 Shell Set
S188 Shell Set 6 (21398)
Clam Shell Press 2 pc.


I made 10 of each shell making a total of 130 shells.


Gumpaste Ingredients:

 
500 grams of sugarpaste (I use Bakels Pettinice, but any will do)
 
2 teaspoons of Cellogen (if you use CMC, Tylose or Gum Trag then only use 1 to 1.5 teaspoons)
 
1/3 teaspoon raw egg white
 
2 teaspoons Cream of Tartar
 
Instructions:
 
Use a little Crisco (here in Australia I use Copha which is a solid white vegetable oil) on your work surface and knead up your sugarpaste so its nice and soft.
 
Sprinkle the Cellogen, or alternative, over the work surface and knead it into the fondant.
 
Make a well in the mix and pour in the egg white, knead until mixed through, it may feel a little sticky, add more Crisco to the surface if you need to or some icing sugar to stop it sticking to your hands.
 
Sprinkle the Cream of Tartar on the work surface and knead into the mix until all incorporated.

(Thanks to Fran for this gumpaste recipe which I have adapted a little.)


Successful Molding by Alan Tetreault
GlobalSugarArt.com


Successful molding using silicone molds is all dependent on the medium you choose. Many decorators call me in frustration that they cannot get a good impression with a silicone mold using sugarpaste.  Generally, for larger or detailed molds, I recommend using at least a 50/50 mix of gumpaste and sugarpaste.  If the mold has a lot of details or undercuts (details that are cut out of the mold that you cannot see from the opening) I use 100% gumpaste.  On a large mold that is very detailed, I recommend adding Tylose to gumpaste to make a very firm and strong gumpaste.  The more detailed the mold, the firmer the gumpaste should be to achieve the best results.  Here are my suggestions:

 
It helps to use a small dot of shortening (Crisco) on our fingertips while pushing the sugarpaste or gumpaste into the mold.
 
1.  For small molds that you want to be able to cut through or eat, use only sugarpaste.  For each pound of sugarpaste, knead in about one cup of confectionery sugar or enough so that the fondant no longer sticks to your hands or the surface you are kneading on.  This will make molding easier and you can handle the finished product without it stretching out of shape.  This also works well on side designs, drapes and borders that you are molding with a silicone mold.  Adding a flavoring to the fondant (like orange, lemon, almond, peppermint, etc.) can be a nice finishing touch.  Especially since it is usually the children that try to eat the decorations!  Freezing the molded fondant for 5-15 minutes before removing helps keep the detail.
 
2. For larger figurines, flowers and borders like pearls and ropes, I recommend a mixture of 50% gumpaste and 50% fondant kneaded together.  This makes a mold that can still be cut through with a knife when you serve the cake but you may not want to eat the pieces.  Freezing the molded fondant for 5 -15 minutes before removing from the mold helps with removal and keeps the detail.
 
3.  For large molds or molds that have undercuts, I use all gumpaste.  Freeze 10 minutes before removing from mold.4.  For very large or detailed molds, I add 1-2 teaspoons of Tylose to one pound of gumpaste and knead it well. Allow it to rest overnight in the refrigerator in a sealed bag.  The next day, break off a piece and knead it well before using it to make a mold.  It will be very firm. Freeze 10-15 minutes before removing from the mold.


These shells were molded using 50/50 gumpaste/sugarpaste with no added confectioners sugar.  
I placed the filled mold in the freezer for 15 minutes then removed the shells from the mold and lightly dusted with non toxic Luster Dust in Spanish Moss (bronze metallic look) by Sunflower Sugar Art from GlobalSugarArt.com. I used a paintbrush to apply the dust.


This YouTube clip will give you a good idea how to use silicon molds even though it shows a baby mold and not a shell mold.

 
Leave the shells to dry for at least 24 hours before gluing them onto the cake with edible glue
Edible Glue
Also called Gum Glue
Add 2 tablespoons of warm water to a quarter teaspoon of Tylose Powder and allow the Tylose powder to melt. Don’t worry if at this stage the glue appears not to be blending. Put a lid on the container and leave it in the refrigerator overnight and in the
morning you will have a perfectly clear and ready to use glue.
 
The glue should be a dripping consistency. If it is too thick, just add a little more water and stir with a toothpick .
 
The edible glue should be stored in the refrigerator when not in use.
 
To apply the glue, use a good quality paintbrush and brush on to the area where you are going to be working. Leave until it begins to dry a little so that the area is just tacky to touch.
 
I left 16 assorted shells to place around the cake and sprinkled some raw caster sugar to look like sand.

 
I hope you like my cake and try making one yourself. Please share your efforts with me as I would love to see what you come up with.

Spiderman Cake

The idea for this cake came from the Spiderman 4 wallpaper below
I copied the spider and the number 4 to cut out in black and red sugar paste.
If you would like a larger sized spider  to print out just visit my ‘Free Stuff’ page.
The cake itself is a 7″ round Dark Chocolate Mud Cake filled and covered in Dark Chocolate Ganache and sugar-paste.
Ingredients
135g butter
135g dk choc
15g coffee
100ml water
75g SR
75g plain
30g cocoa
.3 tsp bicarb
295g caster
2.5 eggs
4.5 tsp oil
60ml buttermilk
Ganache
735g dark chocolate
365ml pure cream
Fondant
740g  red sugar-paste, I used Cake Art coloured sugar-paste
75g black sugar-paste, I used Cake Art coloured sugar-paste
The fondant can be make by colouring white (Ready to Roll) RTR fondant such as Bakels or the supermarket alternative, Orchard with red gel colour such as Wilton gel or Americolor.
For directions on how to make the cake click here but please note that cooking time for the 7″ round cake is approximately 1hr 20mins at 150C. For more help making and using ganache click here.
I piped the spider’s web in black RI (Royal Icing). Click here for the recipe.
I used one quarter of the recipe (the egg powder recipe) and had more than enough. Use a 12″ piping bag with a #2 tip
To make the spider, roll out the black sugar-paste quite thinly and leave it for an hour or two to harden a little before cutting out your shapes using the template.
Spiderman cake plus those eyes

Retro Birthday Cake

This stunning 8″ round cake is a Vanilla Buttermilk Cake layered with Swiss Lemon Meringue Buttercream and covered in sugar-paste.
One thing I really like about this particular buttermilk cake is that it is essentially a one bowl cake, not following the regular cake pattern of creamed butter and sugar, eggs added one by one and then alternating dry and wet ingredients. That’s the good part. The bad part is that it is imperative that you scrape down the bowl often, all the way to the bottom, overdoing it even. Otherwise, little deposits of unmixed butter or flour will sneak up on you.
Otherwise, the cake is really quite simple.
Vanilla Buttermilk Cake 8’ round / 7’ square cake
Ingredients
700 ml cake flour
 (replace 6 tbsp plain flour with corn flour) explained below
470 ml sugar
4.5 teaspoons baking powder
0.4 teaspoon salt
230 g unsalted butter, at room temperature
245 ml plus 60ml buttermilk
4 whole eggs
2 egg yolks
2 teaspoons vanilla extract
 
Directions
1. Preheat the oven to 160C / 325°F. Butter an 8-inch round cake tin. Line the bottom of the pan with a round of parchment or waxed paper and butter the paper.
2. Combine the cake flour, sugar, baking powder, and salt in a large mixer bowl. With the mixer on low speed, blend for 30 seconds. Add the butter and 245 ml of the buttermilk. Mix on low speed briefly to blend; then raise the speed to medium and beat until light and fluffy, 2 to 3 minutes.
3. In a smaller bowl, whisk together the whole eggs, egg yolks, vanilla, and the remaining 60 ml buttermilk until well blended. Pour one-third of the egg mixture into the cake batter at a time, folding it in completely after each addition.
4. Bake for 2 hours, or until a wooden toothpick inserted in the center comes out clean.
5. Turn the cake out onto a wire rack by placing a rack on top of the pan, inverting it, and lifting off the pan. Peel off the paper liner and let cool completely. When cool, place a cardboard cake board on top of the cake, invert again, and lift off the rack. Wrap the cake on its board completely in plastic, so it doesn’t dry out, and refrigerate.
What is Cake Flour?
Replace 2 Tablespoons per cup (per 240ml) of all purpose flour (plain flour) with cornstarch (corn flour) to reduce the gluten content without sacrificing volume.
Recipes that call specifically for cake flour should have liquid volumes calibrated accordingly, so the won’t turn out dry, as long as you don’t ADD the corn flour, but incorporate it, so that the dry volume is the same.
Commercial cake flour is also finer than regular flour. Sifting a few times through with the cornstarch or zipping through a food processor can really help when you’re trying for a lighter-textured cake. “All-purpose flour” seems to be labeled “plain flour” in Australia.

Swiss Lemon Meringue Buttercream

This all-purpose buttercream has an ultra-silky, stable texture that spreads beautifully over cakes and cupcakes, and can be piped into perfect peaks and patterns.
The recipe makes enough to fill a 3 layered 8″ cake or for 24 (or 18 if piping a tall topping)  cupcakes.

Ingredients

4 large egg whites
250g Caster Sugar
pinch of salt
250g Unsalted butter/ softened
1.5 lemons, zest only

Directions

Combine egg whites, sugar, and salt in the heatproof bowl of a standing mixer set over a pan of simmering water. Whisk constantly by hand until mixture is warm to the touch and sugar has dissolved (the mixture should feel completely smooth when rubbed between your fingertips).
Attach the bowl to the mixer fitted with the whisk attachment. Starting on low and gradually increasing to medium-high speed, whisk until stiff (but not dry) peaks form. Continue mixing until the mixture is fluffy and glossy, and completely cool (test by touching the bottom of the bowl), about 10 minutes.
With mixer on medium-low speed, add the butter a few tablespoons at a time, mixing well after each addition. Once all butter has been added, whisk in lemon zest and a little yellow food colouring gel (optional). Switch to the paddle attachment, and continue beating on low speed until all air bubbles are eliminated, about 2 minutes. Scrape down sides of bowl with a flexible spatula, and continue beating until the frosting is completely smooth. Keep buttercream at room temperature if using the same day, or transfer to an airtight container and refrigerate up to 3 days or freeze up to 1 month. Before using, bring to room temperature and beat with paddle attachment on low speed until smooth again, about 5 minutes

Once the cake is layered with the buttercream it needs a crumb coat. Swiss Meringue Buttercream is not much use for this as it is quite soft. On this occassion I have added a very thin coating of white chocolate ganache but could have used a crusting decorators buttercream instead.
This nice firm crumb coat will make it easy to get a nice finnish on the sugar paste covering.

Brush the cake with a thin layer of water (boiled and cooled) this will help the sugar paste stick to the cake.
I used just under 1 kilo of white sugar paste to cover the cake and coloured a further 200g pink, 200g orange and 200g yellow.
I used a pizza cutter to cut out Paisley pattern teardrops, triangles, long ovals, circles and flowers then randomly placed them all over the cake. I stuck them down with some edible glue but a little water would have worked just as well.
Back view
Side view

Pink Tatty Teddy Christening Cake Tutorial

7” White Chocolate Caramel Mud Cake Round
Ingredients
180g butter
180g white choc
162ml water
90 SR
180g plain
120g caster
120g soft brown sugar
2 eggs
1 tsp vanilla
250g nestle Top’n’Fill Caramel
Ganache
780g white chocolate
270ml pure cream
Fondant
780g sugar-paste
Method for the 7″ round white chocolate Caramel mud cake 
(adapted from Planet Cake Cookbook)
Preheat oven to 180C. Grease tin and line the base and sides with a collar of baking paper that extends 2 cm above the top of the tin. Add baking strips (made from damp cloths wrapped in tin foil) around the outside of the cake tin. Put the butter and water in a saucepan over medium heat and stir until butter has melted. Turn off the heat, then add the chocolate and stir until it has melted and is well combined.
Sift the flours together in a bowl. Add the sugars, a pinch of salt and make a well in the centre.
Pour the chocolate mixture, egg and vanilla into the well then stir with a wooden spoon until well combined. Add Top’n’Fill and stir till combined
Pour into the cake tin inserting a flower nail in the bottom of the tin. Bake for 1 hour 20 minutes or until the cake is golden brown and a skewer comes out clean when poked into the middle of the cake. Cover with foil halfway through if the cake is browning too quickly.
Once removed from the oven, use a pastry brush (or similar) to brush the top of the cake with boiled water to keep it moist and save it from cracking and forming crusty bits on top. Then cover with a clean tea cloth to reduce evaporation. Repeat the brushing with boiled water step two or three times at half hour intervals as the cake cools. Remove the baking strips once they can be handled or use oven gloves to remove them.

Let cake cool completely on a wire rack before taking the cake out of the tin.

Wrap the cake well in cling film (do not squash cake) and put in fridge till morning.
  1. Process chocolate till it resembles breadcrumbs and place in a large bowl
  2. Put the cream in a saucepan and bring to a rolling boil. Pour the cream over the chocolate and mix with a hand whisk until the ganache is smooth. (Do not use an electric whisk, as you will create too many air bubbles in the ganache.)
  3. Allow to cool completely and then leave to set overnight.

To torte and cover your cake with ganache click here

To make the teddy. Colour white ready made sugar paste with pink gel colour and add half a teaspoon of Tylose powder and kneed till incorporated. Model all the little bits and pieces in the picture above and leave to harden for an hour or two.

Use dark pink petal dust to brush onto the Teddy’s cheeks with a dry paint brush. Use wooden cocktail sticks to attach arms, legs and head to body along with edible glue made from water and Tylose powder. Use the same method to attach the finished Teddy to the cake.


Hand painted Wedding Cake Tutorial

Materials needed

7″ and 9″ round card for the base of each tier.
Doweling for support
Bottle Green satin ribbon – 6mm wide by 2m
Bottle Green satin ribbon – 2 inches wide by 2m
Black satin ribbon 1 inch wide by 2m
Diamontes buckle
13″ diameter cake board 4mm or 6mm thick
Hand painted Wedding Cake Tutorial
7” Dark Chocolate Mud Cake round

135g butter
135g dk choc
15g coffee
100ml water
75g SR
75g plain
30g cocoa
.3 tsp bicarb
295g caster
2.5 eggs
4.5 tsp oil
60ml buttermilk

Ganache

735g dark chocolate
365ml pure cream

Fondant

740g sugar-paste
9” Dark Chocolate Mud Cake round
220g butter
220g dk choc
25g coffee
160ml water
125g SR
125g plain
50g cocoa
.5 tsp bicarb
480g caster
4 eggs
7 tsp oil
100ml buttermilk

Ganache

1200g dark chocolate
600ml pure cream

Fondant

1.2kg sugar-paste
Click here to learn how to make dark chocolate mud cake and dark chocolate ganache.
Click here to learn how to torte and cover your cake with ganache.
Click here to learn how to cover your cake with sugar paste.

The pattern on the top tier of the cake was inspired by Crewel Embroidery and I looked at many examples on the net for inspiration.
 
Sample of Crewel Embroidered fabric


I wanted to use simplified elements of the original designs to create a new and unique black and white design.  
First of all I made a template for the top of the cake and the sides from some greaseproof paper…
….and then drew on my design with an HB pencil. 
 
I turned the paper around and traced the design on the back, again using an HB pencil (do not use a softer pencil as it will smudge onto your pure white icing and really make a mess). Pencils are made from graphite not lead and are non toxic.
I transfered my design onto the cake using a sharp HB pencil, securing the template with sticky tape around the sides and holding the top down lightly with my fingertips.


 I scanned my greaseproof paper templates for you to enlarge in your photocopier to fit the exact size of your cake. Once you have the outline transferred to the cake you can paint the motifs larger going over the lines a little covering up all the pencil marks as I have allowed for this by drawing the outlines smaller than i require for the finished work.
 
The bottom of each stem is covered by the green ribbon and the top of each stem I ended in an RI dot or two. Choose one of the central stems and line it up with the stem on the top of the cake.
I used Cake Art black edible colour on top but it was a little shiny so used Wilton on the sides and was happier with the finish. I used two round Taklon brushes a No 5/0 to outline and a No 4 to fill in.
If your colour is too thick, use a little Vodka to thin it down. I didn’t need to use any on this occasion.
 
Sorry that the video is so boring and has TV noise in the background but it is my first YouTube clip and I hope to improve. It also shows how slow I am at painting on cake. it took me 4 hours to complete! My brush was rubbish with hairs sticking out at right angles which I cut off making the brush almost impossible to use as there were only about 12 hairs left LOL! I have since replaced it.
Another tip! Use a brush with very long hairs as this helps with lines. Lay most of the brush on the cake and pull it along as this reduces hand wobble.
To make my design zing I wanted to add piped Royal Icing dots but decided to wait until the cake was fully assembled.
 
To assemble the cake I firstly placed the bottom tier on its base using some Royal Icing as glue. I then covered the bare edges of the board using a roll of sugar-paste which I unrolled like you would a carpet around the cake. Join at the back by first overlapping the sugar-paste and cutting with a knife through both layers, removing the excess and joining with a little Royal Icing.
Ali (my partner) marks the length of dowel to be cut while I take the picture.
I needed 4 dowels to support the top tier for this cake and one double height piece for the central dowel (this stops the top tier from sliding about while being transported).
Ali pushes in the first dowel
Ali carefully taps in the central dowel.
The central dowel cuts right through the middle of my design but it is easy to cover this up with a small black sugar-paste cut out, topped with a smaller white round piece of sugar-paste and crowned with a large dot of black royal icing.
Can you see the added dots!
I stuck the black ribbon onto the middle of the green ribbon using 12mm wide double sided tape but left the ends of the bow unstuck so that they could be hanging loosely from the bow as they would look too rigid otherwise.
I didn’t cut the ribbon in any way to form the bow. I just made it look good while holding it in my hand then slipped it through the diamonte buckle trying not to lose any of the nice shape I had.

How to make Ganache and cover your cake with it

I love using ganache to cover cakes and wedding cakes as it tastes incredibly delicious and it’s so much easier to get nice, straight sides and edges compared to buttercream. Ganache is also wonderful to use under sugar-paste for the same reasons. Living as I do on the Gold Coast, Australia, ganache is the obvious choice as it withstands most of our really hot weather MUCH better than buttercream.
Chocolate and cream are the only two ingredients in ganache and are used in a 2:1 ratio for dark and semi-sweet chocolate and the 3:1 ratio for milk chocolate. The wedding cake in the picture above was covered in white chocolate ganache using the ratio 3:1 i.e. 3 parts white chocolate to 1 part cream.
In extremely warm weather it is sometimes necessary to increase the amount of chocolate in the mixture to prevent it melting.
To torte and cover a 9″ round cake with dark chocolate ganache
Ingredients:
1.75 kg dark chocolate
600ml pure cream
To torte and cover a 9″ round cake with white chocolate ganache
Ingredients:
1.3 kg
450ml pure cream
If you prefer a really soft filling for your cakes then just whip ½ cup cream and add 2 tbsp of the Ganache and whip a little more. This makes a delicious and easy chocolate mousse.
Step 1Make the Ganache: Heat the cream until it just starts to bubble, pour over chocolate (which you have blitzed in the food processor to coffee granules size) and let it sit for about a minute to melt. Use a hand whisk to blend it all together then set aside to cool. 
Your ganache at this point will be thin. You will have to pop it in the fridge until it thickens to a slightly thicker peanut butter consistency (don’t cover because you might get condensation). It would  usually set in the fridge in about an hour or two. If it sets too hard, just microwave it in 10 second intervals (keep mixing it whenever you take it out).
Proccess the chocolate to the size of coffee granules
 Ganache nice and smooth

Ganache nice and smooth
Cutting cake into layers. Keep original layer of greaseproof paper on as long as possible to keep cake intact add a board or metal base to the top of the cake when cutting as you may accidentally put pressure on the top of the cake when cutting and dent your nice flat top.
Cut out a circle of non slip matting
This will stop your cake moving about on top of the turntable
Step 2Torte and level the 9″ cake: Place cake upside down on the cake board on a layer of ganache to act as a glue and to even out any irregularities. Add a mound of ganache in the middle of the board if your cake sunk or add a ring of ganache round the edge if you cake was high in the centre. If you are using the soft filling then pipe a ½” snake of Ganache around the outside edge of the cake to create a dam, pop the cake into the fridge for the dam to harden (about 5 min) remove from fridge, then fill with the filling. If using regular ganache to fill then apply with a cranked handled palette knife if you have one.
Top with the next layer of cake and repeat if needed. 
 
Step 3Crumb coat: (optional) Cover sides and top of cake quickly with a thin coat of ganache to stop crumbs getting into your final coat of ganache. This is useful especially if your cake is more crumbly than normal. Put in fridge for an hour or so to harden before continuing. 

Applying a quick crumb coat
A set square helps me get perpendicular sides
Crumb coat complete
Step 4Cover the top of the cake with Ganache: I like using the ‘double board’ method to get the top edge of the cake perfectly smooth. Top the cake with a 1/2” layer of Ganache, smooth it out then place a 9″ board on top which has been completely covered on both sides with cling film to keep the board clean and reusable and secured with sticky tape. Check with a small spirit level to see if it’s leveled, if not, gently press down around the cake until it is.
 
Step 5Cover the sides of the cake with Ganache: You want to always add more ganache than you need at the beginning because it is so much easier to just scrape off the excess and be done rather than to keep adding then scraping then adding then scraping…etc. As the 9” cake board is slightly larger than the cake (9” cake shrinks a little after cooling). I use the edge of the two boards as a guide to the thickness of the Ganache. Once you have added the Ganache along the sides, use a metal scraper or similar tool, to scrape the excess off a little at a time, layer by layer as you turn the turntable.
Step 6: Place the cake into the fridge for at least a ½ hour, remove, then carefully undo the cling and lift off the board then carefully peel the cling film from the top of the cake. You may need to smooth away the little imperfections or fill any air holes with a little bit of Ganache.
I went straight ahead and covered these 4 cakes with sugar-paste but I could have used a hot palette knife to smooth out any remaining imperfections if the cakes were not being covered,

Step 7: Let the cake sit overnight at room temperature for the Ganache to completely set. If you live in a hot climate like I do then best to put it in the fridge overnight. A wine fridge is best (as it is not so cold as your normal fridge in the kitchen) and has a built in humidifier. The cake will get quite hard and cold overnight and it is important that the cake gets back to room temp before covering with sugar-paste.( If you do not allow your cake to reach room temp, all the way through, the cake will sweat through your sugar-paste!) Before covering you can either brush or spray the cake with a little bit of water or vodka (it evaporates away anyways) or some type of syrup (apricot jam diluted with water). 

 
The above recipes make more ganache than is needed so that there is enough to allow for mistakes and for putting on extra and then scraping back off the excess. I also freeze any untouched ganache for my next cake.


Use these steps to make a gorgeous Pink Tiffany Wedding Cake

.

SaveSave