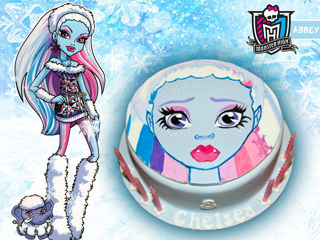
Abbey Monster High Cake Tutorial

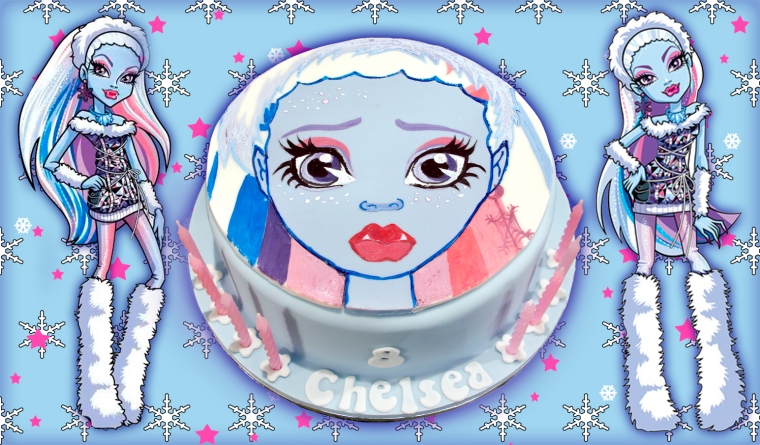
Abbey Monster High Cake

Below are the instructions on how to bake, decorate and hand paint this cute Abbey cake but first…

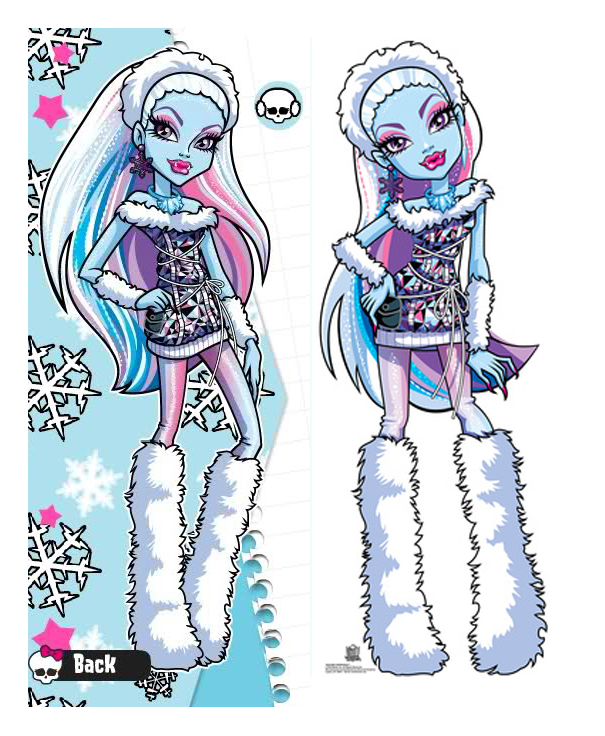
…welcome to Monster High, the place where children of famous monsters rule the school! Abbey Bominable is 16 years old and the daughter of Yeti! She’s the coolest ghoul in the school and I love her trendy wardrobe and white fur boots. Her BFF is Draculaura and I have a Draculaura cake tutorial that you might like here.
Draculaura Cake
Draculaura Cake

Although Abbey is very pretty she says ‘I am cold in the touching and being touched’

Her favourite sport is Snow Boarding and her pet “shiver’ s an adorable baby Wooly Mammoth.

Shiver
Shiver

Instructions

This 7″ Abbey birthday cake is made from dark chocolate mud-cake and filled with dark chocolate ganache.

Materials

10″ cake board

7″ set up board

1.2 kg Ice blue sugar-paste

For cake topper….

Tylose powder

Edible Americolor gel colour in blue, white, pink and lilac

White sugar-paste

Make the 7″ round Dark Chocolate Mud Cake

190g unsalted butter

155g dark chocolate

4g instant coffee

1 cup warm water

145g caster sugar

200g self raising flour

23g cocoa

1 large egg

1 teaspoon vanilla

1. Grease and line base and sides of cake pan with one thickness of baking paper, bringing paper 5cm above side of pan.

2. Combine chopped butter, chopped chocolate, coffee, and water in a saucepan. Stir over low heat until chocolate is melted. Cool 15 minutes. Transfer mixture to bowl of mixer.

3. Add caster sugar to mixture and beat well until dissolved. Add sifted flour and cocoa, lightly beaten egg and vanilla.

4. Pour mixture into prepared pan.

5. Bake at 150C for 1 – 1.5 hours . Test with skewer. Cool cake in pan.

Make the Dark Chocolate Ganache

600g dark chocolate, finely chopped

250ml pure cream

Method:

Heat the cream until it just starts to bubble, pour over chocolate (which you have blitzed in the food processor to coffee granules size) and let it sit for about a minute to melt. Use a hand whisk to blend it all together then set aside to cool. Your ganache at this point will be thin. You will have to let it set overnight until it thickens to a slightly thicker peanut butter consistency. Since I don’t have the patience to wait, I just let it cool to room temperature and then pop it in the fridge (don’t cover because you might get condensation). It would usually set in the fridge in about an hour or two. If it sets too hard, just microwave it in 10 second intervals (keep mixing it whenever you take it out).

For more information on how to make ganache and cover your cake with it, please click here.

Assembling the cake

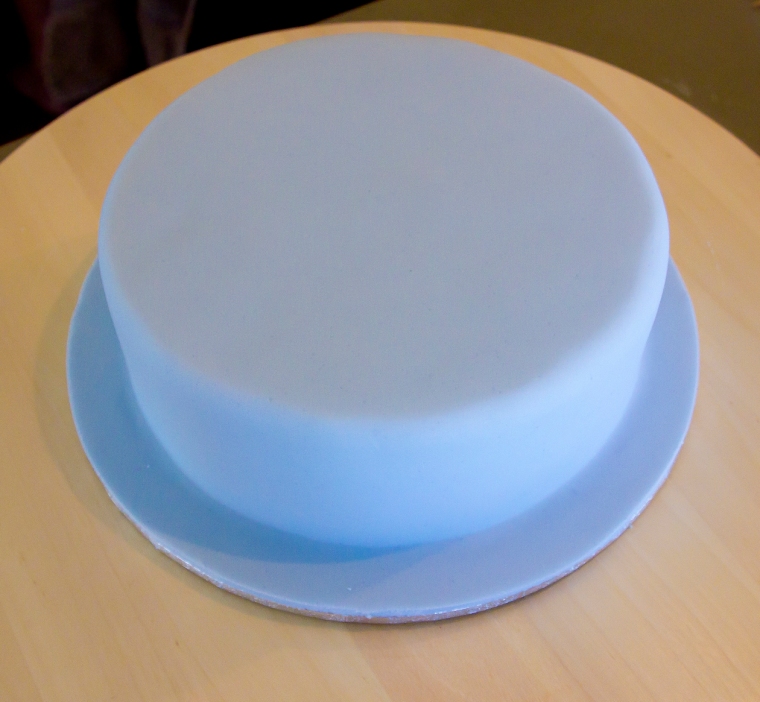
Cut the cake in half and fill with ganache. Attach cake to set up board with edible glue or some Royal Icing. Cover the top and the sides of the cake with ganache and smooth the surfaces. Cover cake and board in one application with Ice blue sugar-paste.
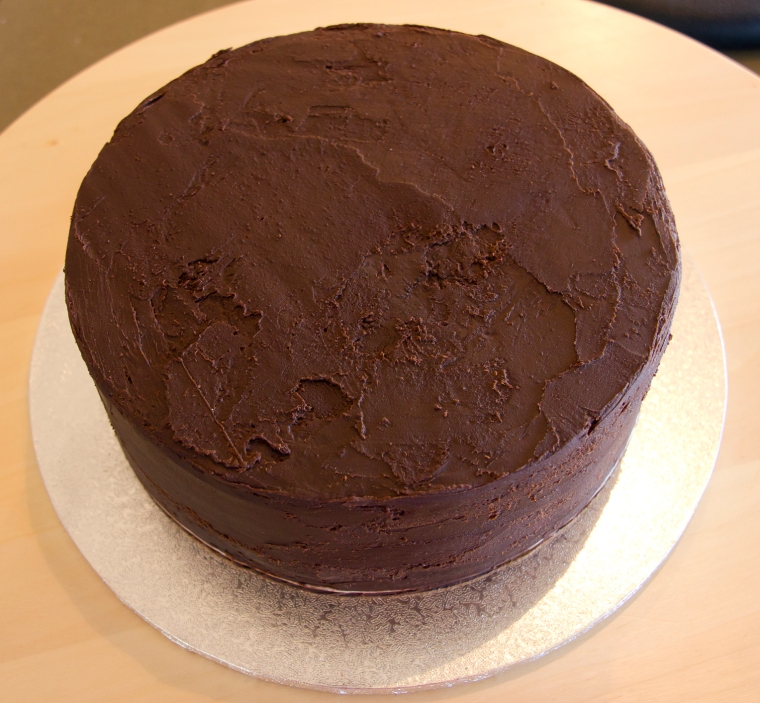
Cake covered with ganache
Cake covered in Ice blue sugarpaste
Printable image
Printable image

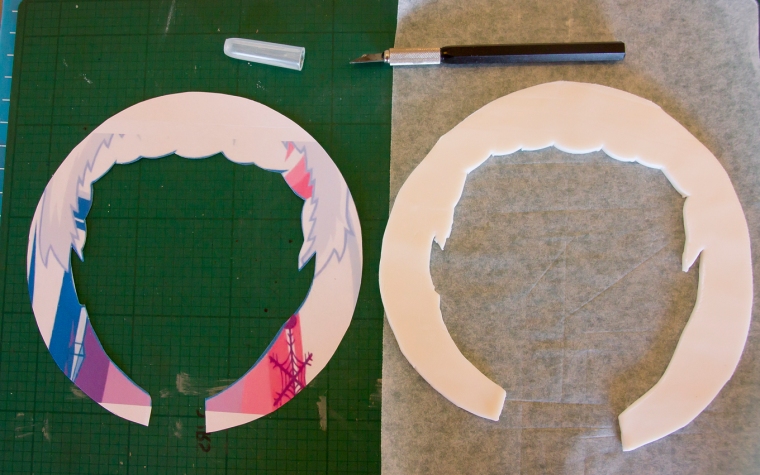
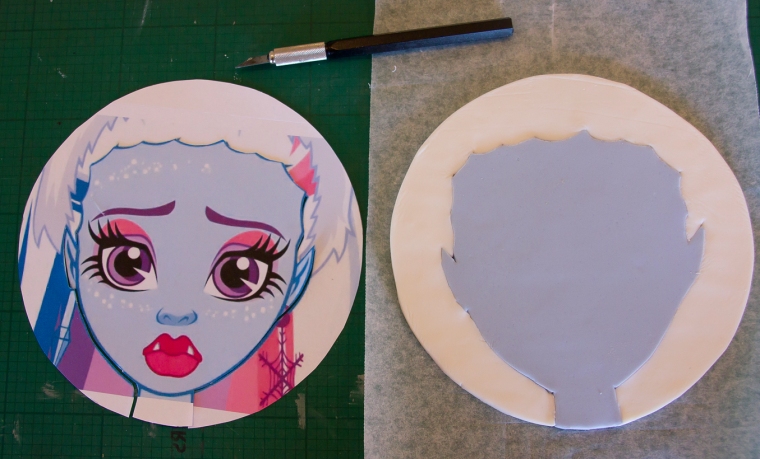
Using the Template Click on the image above and save image. Enlarge or reduce the image to fit your cake. I printed it out to fit a 6.5″ circle just a little smaller than the cake. Print 2 copies so that you can keep one copy intact and the other you can cut up to make smaller templates. 1. Face, ears and neck (cut out in Ice blue sugar-paste). 2. Hair and headband (cut out in white sugar-paste).   You may wish to make a little modelling paste in white and some in Ice blue for the Abbey cake topper. This will help the topper dry quichly and make it stronger. Modelling Paste 350g sugar-paste 1 teaspoon Cellogen (if using CMC, Tylose Powder or Gum Trag then use only 0.5 teaspoon) Sprinkle the powder over the sugar-paste and kneed carefully till smooth.

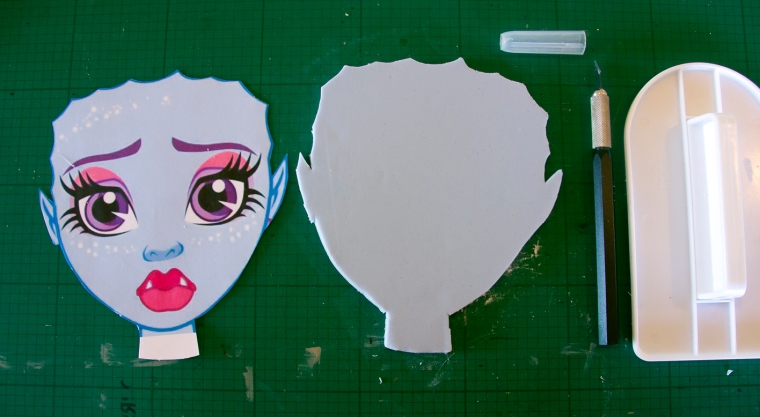
Cut out the face and neck in Ice blue sugarpaste
Cut off any rough edges
Cut the hair and headband section from white sugarpaste
Neaten up rough edges if necessary
The two sections should fit together well

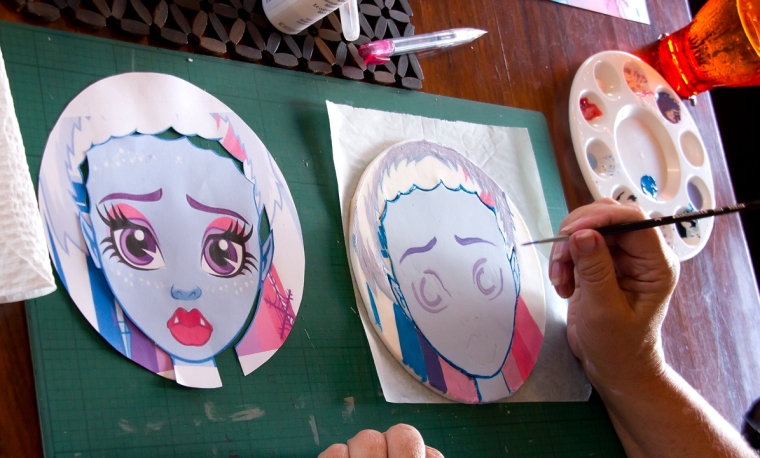
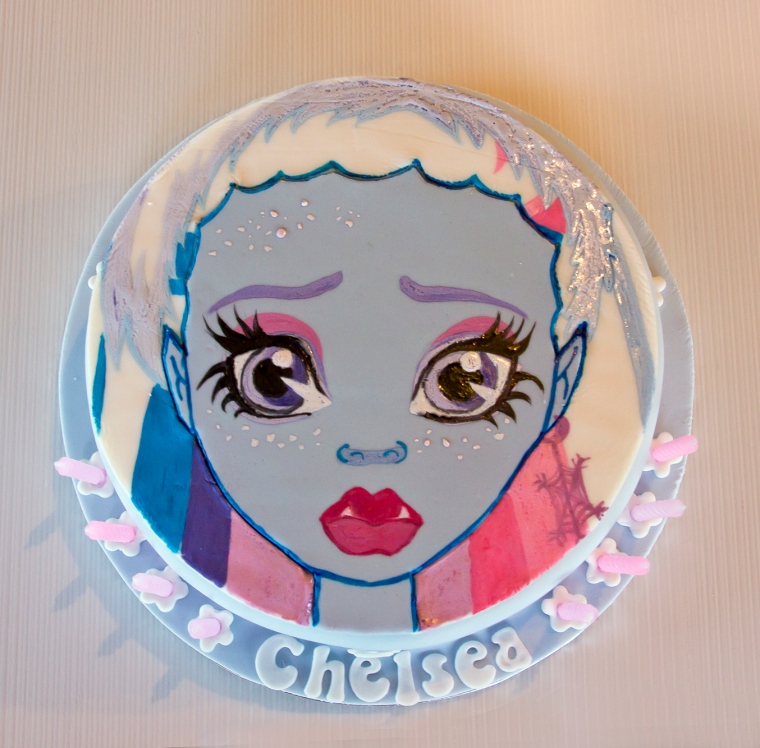
Using a few fine paintbrushes, edible gel colours and a little Vodka as a thinner start painting the hair / headband area as it is simpler and then paint in the facial features last. To help me place the eyes, nose and mouth in the right spots, I used the face template, tracing the outline of the features on the back of the template and then transferring the details onto the Ice blue sugarpaste by tracing over the outlines of the features with the template the right way up on top of the sugarpaste. You can see the fine graphite outline of the lips in the image below.

I have made a video of me painting Abbey’s face and will upload it here shortly.

Painting the face and hair with edible food colour
Abbey
Abbey
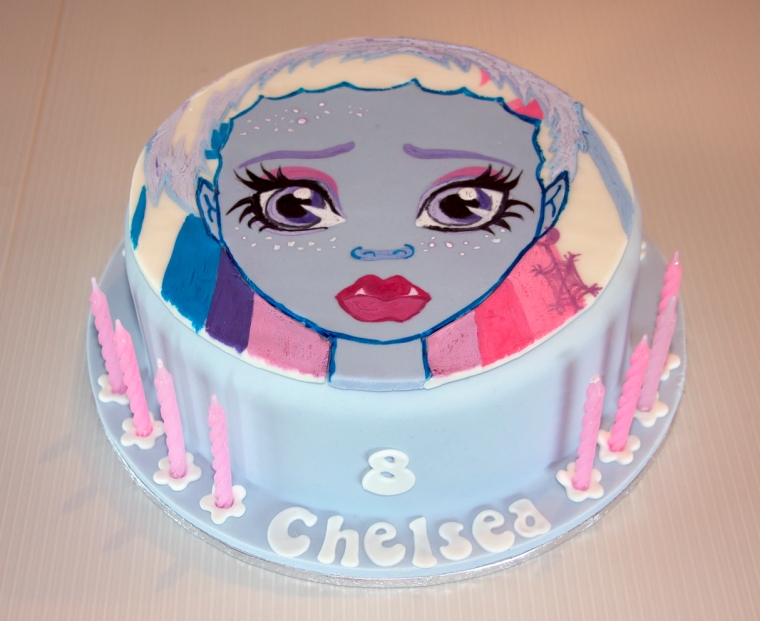
Add pink candles for a nice contrast
Add 'Chelsea' to the covered cake board
Add ‘Chelsea’ to the covered cake board

Abbey Monster High Cake

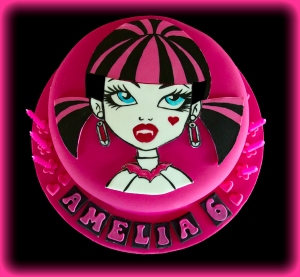
Draculaura Monster High Cake Tutorial

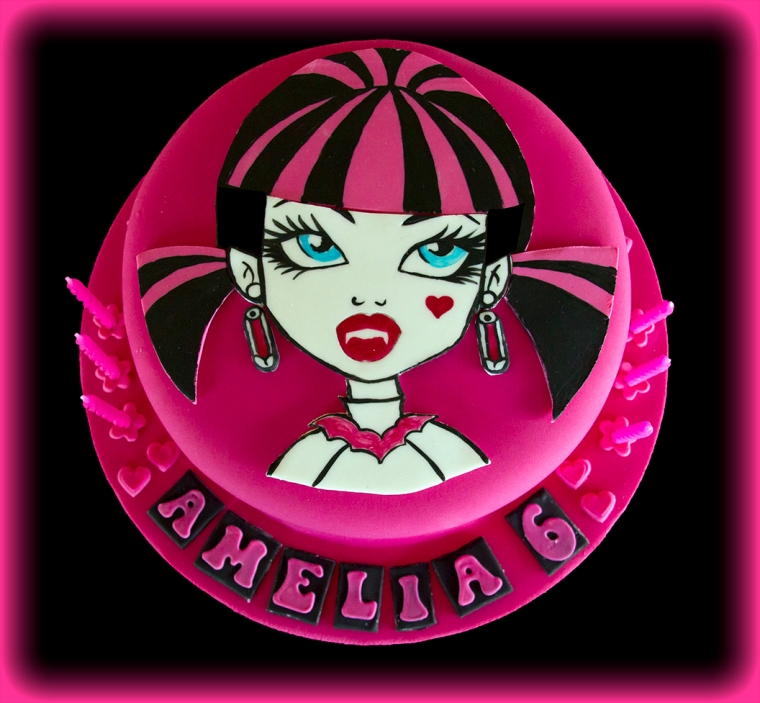
Draculaura Cake
Draculaura Cake

Welcome to Monster High, the place where children of famous monsters rule the school! My favorite is Draculaura, Count Dracula’s daughter! She’s the coolest ghoul in the school and I love her trendy wardrobe and her scary cute pets, too.

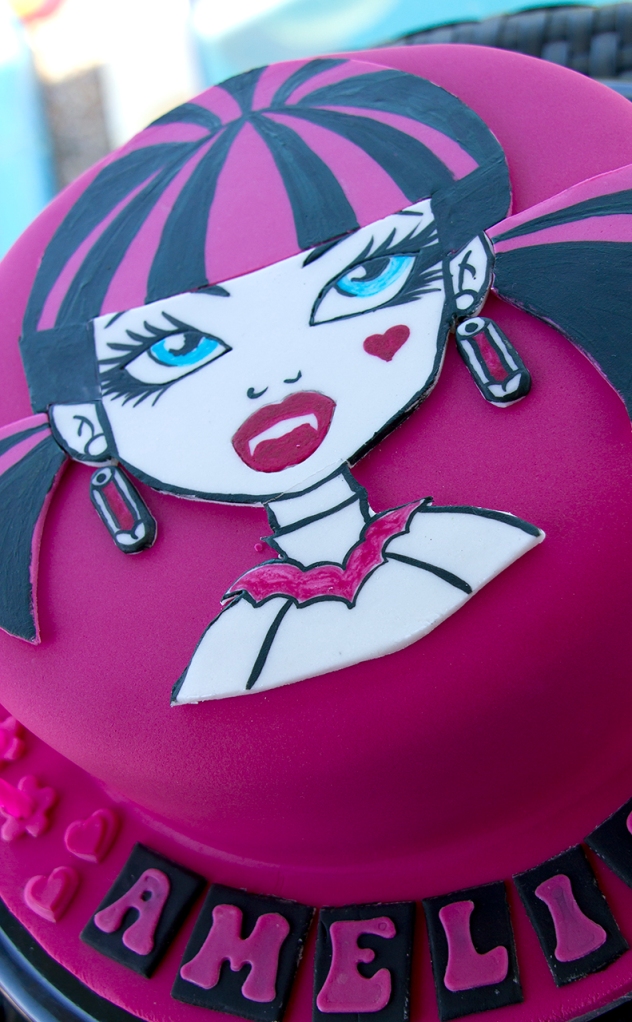
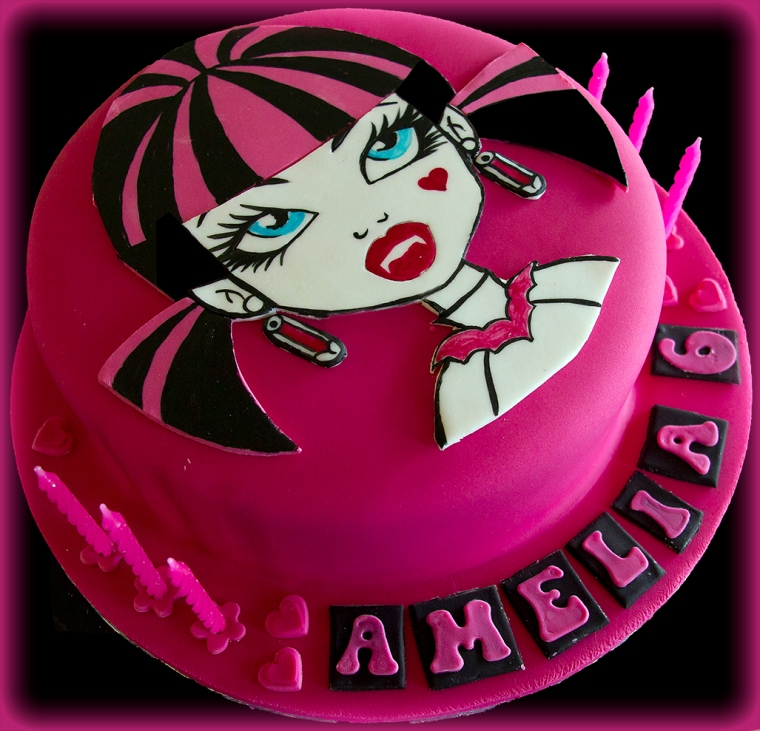
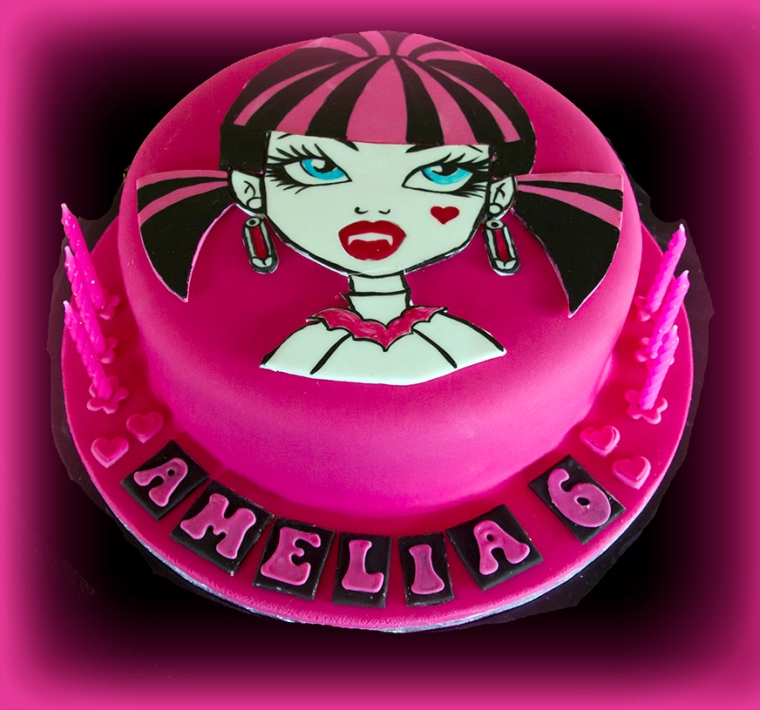
She is so popular that Amelia decided she would like a Draculaura cake on her birthday!

This 7″ Draculaura birthday cake is made from dark chocolate mud-cake and filled with dark chocolate ganache.

Materials

10″ cake board

7″ set up board

1.2 kg fuchsia sugar-paste

For cake topper….

Tylose powder

Americolor Fuchsia gel colour

Black sugar-paste

White sugar-paste

Light fuchsia sugar-paste

Make the 7″ round Dark Chocolate Mud Cake

190g unsalted butter
155g dark chocolate
4g  instant coffee
1 cups warm water
145g caster sugar
200g self raising flour
23g cocoa
1 large egg
1 teaspoon vanilla
1. Grease and line base and sides of cake pan with one thickness of baking paper, bringing paper 5cm above side of pan.
2. Combine chopped butter, chopped chocolate, coffee, and water in a saucepan.
Stir over low heat until chocolate is melted. Cool 15 minutes. Transfer mixture to bowl of mixer.
3. Add caster sugar to mixture and beat well until dissolved. Add sifted flour and cocoa, lightly beaten eggs and vanilla.
4. Pour mixture into prepared pan.
5. Bake at 150C for 1 – 1.5 hours . Test with skewer. Cool cake in pan.
Make the Dark Chocolate Ganache

600g dark chocolate, finely chopped

250ml pure cream

Method: Heat the cream until it just starts to bubble, pour over chocolate (which you have blitzed in the food processor to coffee granules size) and let it sit for about a minute to melt. Use a hand whisk to blend it all together then set aside to cool.
Your ganache at this point will be thin. You will have to let it set overnight until it thickens to a slightly thicker peanut butter consistency. Since I don’t have the patience to wait, I just let it cool to room temperature and then pop it in the fridge (don’t cover because you might get condensation). It would  usually set in the fridge in about an hour or two. If it sets too hard, just microwave it in 10 second intervals (keep mixing it whenever you take it out).
For more information on how to make ganache and cover your cake with it, please click here.
Assembling the cake
Cut the cake in half and fill with ganache.
Attach cake to set up board with edible glue or some Royal Icing.
Cover the top and the sides of the cake with ganache and smooth the surfaces.
Cover in fuchsia sugar-paste.
Draculaura character
She loves to splash her black outfits with some cheery pink, and even carries a frilly umbrella so she can take an occasional walk in the sun.
Template
Template

Using the Template

Click on the template above and save image. Enlarge or reduce the image to fit your cake. I printed it out to fit a 6.5″ circle just a little smaller than the cake. Print 2 copies so that you can keep one copy intact and the other you can cut up to make smaller templates.

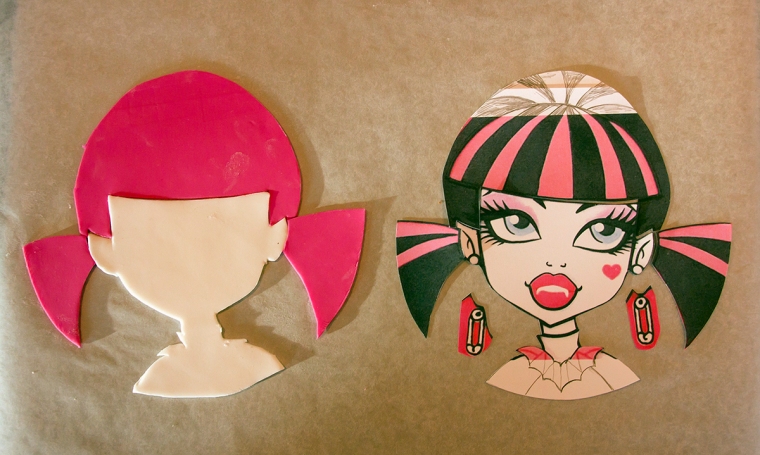
1. Face, ears and sholders (cut out in white sugar-paste).

2. Hair on top of head (cut out in light fuchsia sugar-paste).

3. Hair bunches at side of head ( cut out in light fuchsia sugar-paste).

4. Earrings (white)

Cut template into smaller pieces
Prepare white and Fuchsia sugar paste and  cut out hair, face and earrings.
Prepare white and light fuchsia sugar paste and cut out hair, face and earrings.

You will need to make a little modelling paste in white and some in light fuchsia for the Draculaura cake topper. This will help the topper dry quichly and make it stronger.

Modelling Paste

350g sugar-paste

1 teaspoon Cellogen (if using CMC, Tylose Powder or Gum Trag then use only 0.5 teaspoon)

Sprinkle the powder over the sugar-paste and kneed carefully till smooth.

fit pieces together and allow to dry out a little more fit pieces together and allow to dry out a little more

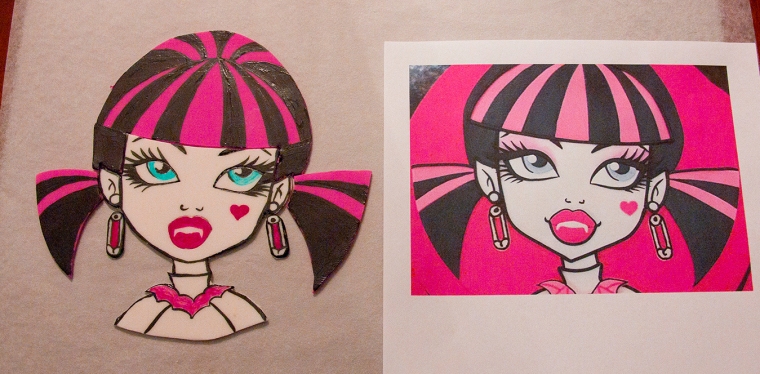
Painting Draculaura cake topper

I used Wilton and Americolor edible gel colours which I thinned with a little Vodka. I was not sure how I was going to achieve a good result but just got stuck in with ‘paint’ and brushes. I was quite pleased with the outcome and I have put together a video of my attempt on YouTube. Unfortunately the camera was not switched on when I was painting the eyes and mouth (the important bits) but the video is still worth watching as i have speeded it up to lessen the boredom and give you a laugh.


Check everything fits

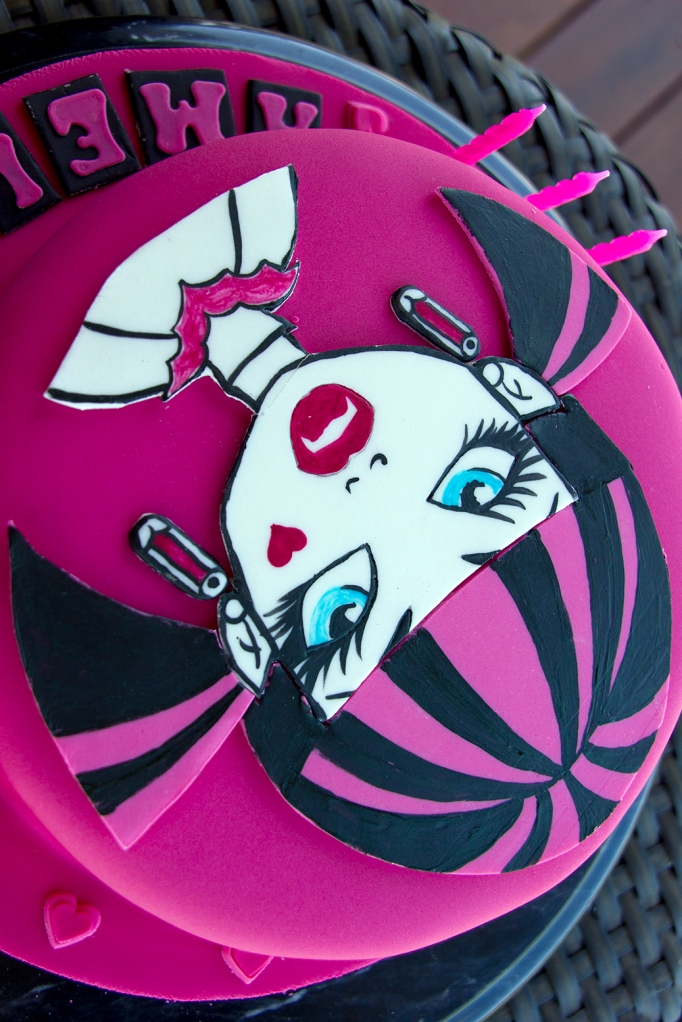
Draculaura askew

Draculaura upside down

Monster High Logo

Draculaura side
Draculaura can’t see her reflection in a mirror, she has to leave the house not knowing if her clothes and makeup are just right. Of course, after 1,600 years of practice she’s gotten pretty good at it.
Draculaura low angle
Draculaura is a vegan. No icky blood for her, so it’s fruits, vegetables and a lot of iron supplements.
Draculaura Cake
Draculaura Cake

Ballerina Shoes Cake

Ballet shoes cake
Ballet shoes cake

This 9″ Ballerina Shoes birthday cake is made from dark chocolate mud-cake and filled with dark chocolate ganache.

Materials

0.5 metres of 1 metre wide net

Glue gun

14″ cake board

2 x 9″ set up boards

Super Pearl Dust (Sweet Inspirations)

Hot Pink Twinkle dust (Global Sugar Art)

Clay gun

1.2 kg white sugar-paste

300g pink sugar-paste

Quilting mold

silver edible balls

Tylose powder

Make the 9″ round Dark Chocolate Mud Cake

500g unsalted butter
400g dark chocolate
10g (2 tablespoon) instant coffee
2-2/3 cups warm water
380g (2 cup) caster sugar
520g (3 cups) self raising flour
60g (1/2 cup) cocoa
4 eggs
2 teaspoon vanilla
1. Grease and line base and sides of cake pan with one thickness of baking paper, bringing paper 5cm above side of pan.
2. Combine chopped butter, chopped chocolate, coffee, and water in a saucepan.
Stir over low heat until chocolate is melted. Cool 15 minutes. Transfer mixture to bowl of mixer.
3. Add caster sugar to mixture and beat well until dissolved. Add sifted flour and cocoa, lightly beaten eggs and vanilla.
4. Pour mixture into prepared pan.
5. Bake at 150C for 1 hour 45 mins. Test with skewer. Cool cake in pan.

Make the Dark Chocolate Ganache

1.2 kg (2lb 10oz) dark chocolate, finely chopped

500ml (17.5 fl oz) pure cream

Method: Heat the cream until it just starts to bubble, pour over chocolate (which you have blitzed in the food processor to coffee granules size) and let it sit for about a minute to melt. Use a hand whisk to blend it all together then set aside to cool.
Your ganache at this point will be thin. You will have to let it set overnight until it thickens to a slightly thicker peanut butter consistency. Since I don’t have the patience to wait, I just let it cool to room temperature and then pop it in the fridge (don’t cover because you might get condensation). It would  usually set in the fridge in about an hour or two. If it sets too hard, just microwave it in 10 second intervals (keep mixing it whenever you take it out).
For more information on how to make ganache and cover your cake with it, please click here.
Assembling the cake
Cut the cake in half and fill with ganache.
Attach cake to set up board with edible glue or some Royal Icing.
Cover the top and the sides of the cake with ganache and smooth the surfaces.
Cover in white sugar-paste.
Press a quilting mold to the sides of the cake to make quilting effect or measure and indent with the side of a ruler.
Brush the top and sides of the cake with Super Pearl dust.
Use the other end of a paint brush to make holes for the silver balls and use some edible glue to attach them.
Add any lettering at this stage.

To make edible glue

Add 2 tablespoons of warm water to a quarter teaspoon of Tylose Powder and allow the Tylose powder to melt. Don’t worry if at this stage the glue appears not to be blending. Put a lid on the container and leave it in the refrigerator overnight and in the morning you will have a perfectly clear and ready to use glue.
The glue should be a dripping consistency. If it is too thick, just add a little more water and stir with a toothpick .
The edible glue should be stored in the refrigerator when not in use.
To apply the glue, use a good quality paintbrush and brush on to the area where you are going to be working. Leave until it begins to dry a little so that the area is just tacky to touch.

To make the tutu

Cut the net into 2 strips each 15 cms wide.

Join the strips with pins to make a 2 metre length then machine stitch along one long edge with the largest stitch on your machine.

Pull one of the threads to gather the fabric into the tightest circle possible and sew in place.

Place tutu onto a 14″ cake board and glue down with a glue gun.

Use a  9″ set up board to sit on top and glue this on with a glue gun. Place a 5 kilo bag of flour (or something heavy) on top till set.

Trim your tutu so that it sticks out about 1 cm from the edge of your cake board.

Place your cake (which should be on a matching 9″ set up board) on top using your glue gun or PVA glue to stick it down.

Ballet Shoe template

To make the Ballet Shoes

Print out the shoe template onto thin card so that the sole measures 14 cm in length and cut them out.

Use the templates to cut out 2 soles and two toes in pink sugar-paste and remember as we work through the rest of the instructions that you are aiming to make a left and right shoe.

Use edible glue to attach the uppers to the soles. I turned a little of the edge of the upper under the sole but I think it might have looked better just to join them edge to edge.

Fill the shoes with cotton wool to keep their shape (the cotton wool stuck a little to some glued edges so I would recommend scrunched cling film instead).

Leave shoes overnight to harden.

Next day remove packing and add the stitched band around the top of the shoe by cutting and glueing a narrow strip of pink sugar-paste around the top edge of each shoe and use a cocktail stick to make the little holes.

Making the shoes
Making the shoes

Use the clay gun to make the little bows and glue them in place with edible glue.

Dust the shoes inside and out with pink twinkle dust and attach to cake with edible glue. I also used a cocktail stick to anchor the toe of the angled shoe to the cake as the cake was travelling by car to the birthday girl.

Cut out 4 long strips of pink sugar-paste to make the ribbon ties and dust them on both sides before glueing them to the shoes.

Brush more pink dust over the shoes where needed.

Ballet shoes cake topper
Ballet shoes cake bow

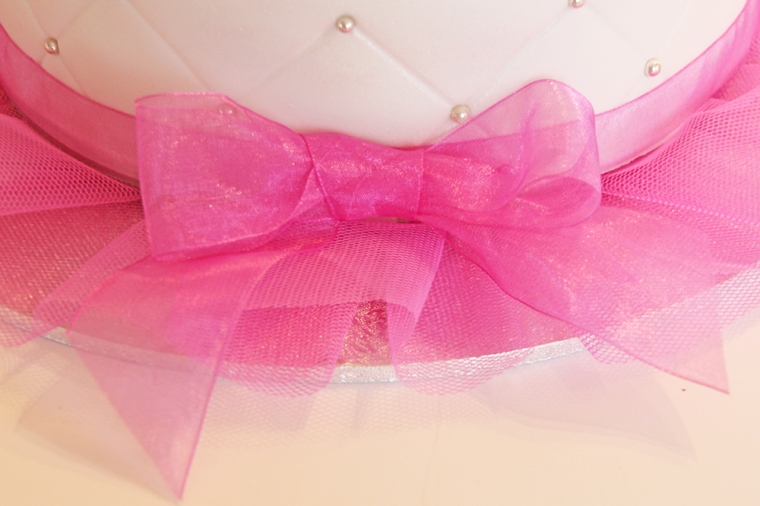
Use a ribbon in the same shade as the tutu, around the base of the cake and make a bow for the front.

Ballet shoes cake top
Ballerina Shoes Cake

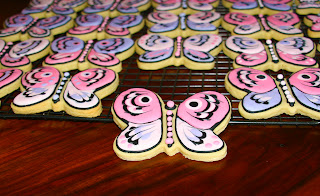
Butterfly Cookies Step by Step Tutorial

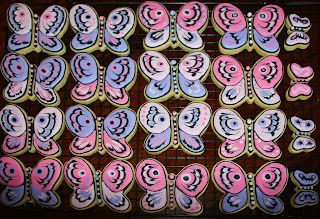
These cookies are iced using the ‘Outlining and Flooding’ technique which is simple to learn. The outline works as a dam or wall to hold the runny icing which you use to fill in the main parts of the cookie.


Buttery Sugar Cookies Recipe click here
Cookie Leveller click here


Royal Icing Recipe click here
Traditionally a thicker consistancy icing is used to outline the cookie shape and then a thinner one to fill in. I have come to prefer using the same icing to outline and flood my cookies because it saves time preparing and filling icing bags twice for each colour.
Outlining
Outline your cookies first and leave at least 15 minutes before you flood the inside of the ‘dam’ (outline). If the outline is a dark colour as here, it is best to wait 24 hours so that the colours don’t bleed into each other.

Sweetopia

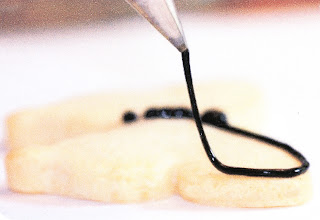
To outline the cookie hold the bag at 45 degrees and position the tip on your cookie. Put enough pressure on the bag so that the icing comes out and you can start moving in the direction that you want your icing to go. Start lifting the pipping bag till it is a few centimetres above your cookie and the icing just falls in a continuous line onto the cookie below. Come back closer to the cookie at corners and when finishing also reduce or stop pressure on the bag to go more slowly or to stop.

Flooding
Use a number 3,4 or 5 sized piping tip depending on the size of your cookie. Fill in one area at a time quickly zig zagging back and forth. Don’t worry if you haven’t filled in every spot: speed is more important at this point. To fill in these little missed bits just use your piping tip, toothpick or small paintbrush (used only for food), to push the icing into your missed bits.

Decorating
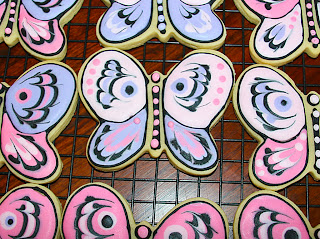
To colour the wings by ‘melding’ several colours into each other then you must do it straight away. The base layer starts to dry quickly so you need to add your next colours as fast as possible.

Sweetopia

Add two black lines of icing with a contracting colour in-between then drag through the lines with a cocktail stick or a pin. Have a look at some pictures of real butterflies to get an idea of what it is that you want to achieve.

The ‘eye’ of the butterfly is then made by layering a few coloured dots on top of each other, with the black as the final coloured dot.

Storing
Let the cookies dry for 24 hours before you package them.
Store in an airtight container in a cool dry place out of the sun (sunlight can fade the colours). The cookies can keep for up to 3 months but I prefer to use them up within a month.

I would like to thank Sweetopia for the original idea and for 3 images.

Hannah Montana Cake

  1. I used the Planet Cake recipe for dark chocolate Mud Cake then torted and covered it in dark chocolate ganache also from Planet Cake. Click here for Planet Cake Recipe for dark chocolate mud cake.
  2. I covered the cake in white sugar paste from Bakels and covered the board with it in one go i.e. I cut out a circle of sugar paste that would cover the cake and the board then just shaped it all to fit with my hands. and made the bow using a tutorial on YouTube.
  3. I found an image of Hannah Montana on Google images and also the Hannah Montana logo. Using Photoshop I put the two images together and used ‘Stroke’ to make 3 pink outlines around her to match the colours in the cake. Click here to find those images.
  4. For ‘Lexi’ I picked a font on Photoshop and curved it then printed it out. Next I traced the letters onto tracing paper and used a pin to transfer the outline onto the cake. I piped the outline in pink Royal Icing using a No 1 nozzle and flooded the centres using a larger nozzle.
  5. Flowers and stars were made from sugar paste using small metal cutters and piped on top with white Royal Icing dots. The covered wires were inserted into the flowers and stars before they dried.
  6. Finally I trimmed the edge of the cake board with matching pink satin ribbon attaching it all the way round with very thin double sided sticky tape used by scrap-bookers.

This cake was 7″ diameter and looked really cute and girl